Bandana Skirt Set

I have had the pictures for this post for quite a while, but I knew if was going to take me a long time to type it up. I have made several of these outfits to sell at a craft fair and also for gifts, and I think they are so cute! You can make them anywhere from a size 6 month up to about 4T. I will try to make these instructions as clear as possible. If you have any questions, please leave them for me in the comments, and I will try to explain the steps better!
To start, you will need the following:
1. Child's T-shirt in the size and color you want
2. 2 bandanas
3. 5.5 to 6.5 inches of border fabric
4. 3/4 inch elastic
5. Wonder Under or Heat and bond light fusible webbing
6. Totally Stable iron on stabilizer
7. Optional but nice, "Over the Back Fusible Interlining" for the back of the applique
8. Fray Check
9. Basic sewing skills and tools, ie thread, rotary cutter, etc.
All seams are 3/8 inch allowance unless otherwise noted.
Prewash all your fabric before beginning. Next line up your bandanas, right sides together, as best you can. I use this chart to figure out how long to make my skirts. I prefer to make the skirt about an inch below knee level so that they last a little longer. For sizes up to 2T, I add a 2.5 inch border. For bigger sizes, I add a 3 inch border. You want to allow 1 1/4 inch for the casing and 3/8 inch for adding the border at the bottom. Therefore if I cut my fabric the same length as the amount given for the finished length of the skirt, I get the length of skirt that I want. So, if I am making a size 12-18 month skirt, I will cut the bandana 8 inches long width wise. (Measure from one of the finished edges.)
Line up your border fabric, folded from selvage to selvage, and cut a 5.5 inch strip for 2T and under or a 6.5 inch strip for larger sizes. Fold it in half the long way, right sides together, and press. (I don't have a picture here or this exact step but you can see what it looks like in the next few steps.)

Pin together the bandana pieces, right sizes together, and sew the sides of the skirt. You do not need to finish the edges since they already are! The cut edge will be the top of the skirt, and the finished edge will be where you attach the border.
Press seams toward the back of the skirt.

To attach the border, line up the edge of the border with the bottom of the skirt, right sides together, 3/8 inch from the seam line on one side of the skirt. Pin and begin sewing a few inches from the seam line. Make sure the unfolded edge of the border is lined up with the finished edge of the skirt bottom.

Continue sewing until you are a few inches from the seam line again.

Stop sewing at this point and remove the skirt from the machine.

Line up the remaining border and make a small mark where the border fabric overlaps itself 3/8 inches.

Use a rotary cutter to cut the extra border fabric off.

Unfold the border fabric from both sides, place it right sides together, and sew. (This is hard to explain but will make sense once you do it. Go slowly and unfold and line up edges as you go along.

Remove from machine and fold the seam inside the border flat. You can press if you want, but I usually just use my fingers.

Line up the two seams as closely as you can. I like to have one seam pointing one way and one the other to reduce bulk.

Finish sewing the border to the skirt. Then use an overlock stitch or serger to finish the edge.

Press the seam toward the skirt and top stitch about 1/8 inch from the border to hold in place. I use a 3.0 stitch length.
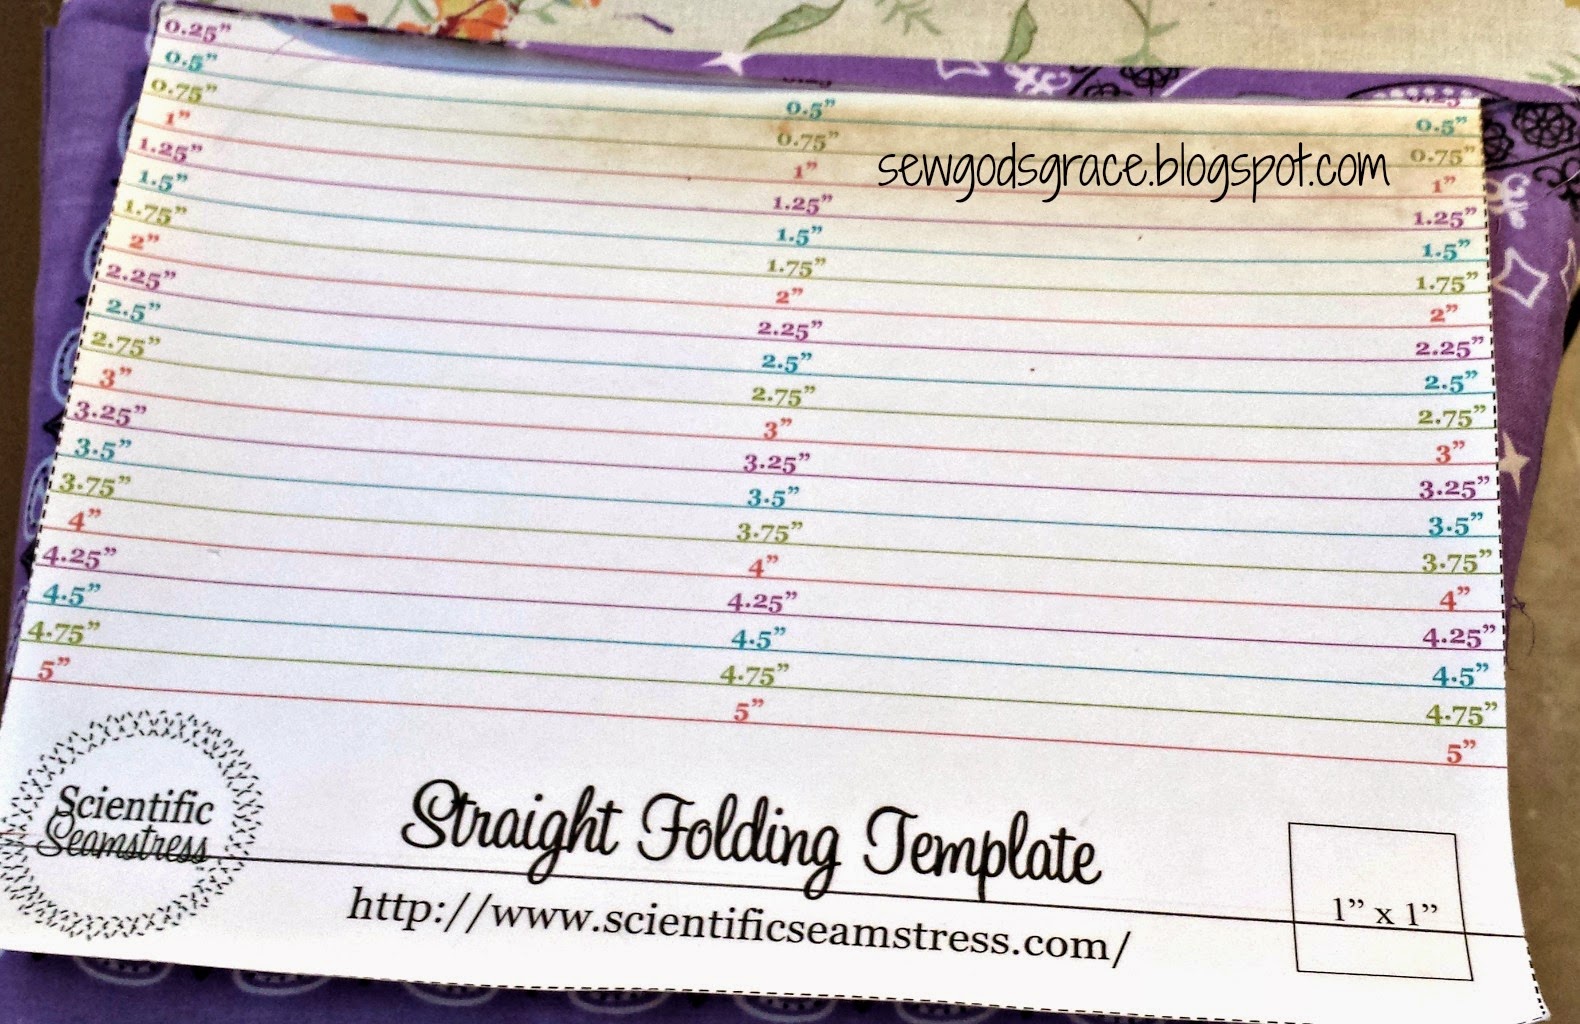
Now for the casing. I like to use this Straight Folding Template to help fold the top edge of the skirt over 1/4 inch. Then fold it over an additional 1 inch, press and pin in place. I just print the template out on card stock--looks like I am about due to print out a new one!

Then top stitch close to the edge around your casing, leaving about 1.5 inches open to put the elastic through.

Cut 3/4 inch elastic to the length specified in this chart, and feed it through with a safety pin. Overlap the elastic about one inch and secure with a zig zag stitch. Make sure that you do not twist the elastic at this step. Top stitch the opening closed. Make sure to pull the fabric flat as you do.

I like to add a label on the back with a size. I use printable fabric paper to design my label. I cut it out and iron the edges under about 1/8 inch. I have found that, even though the instructions say to hand wash, the labels hold up for quite a while with regular washing. For the size, I use white ribbon and iron on transfer paper. See this tutorial for more information on label making. Center and attach label to the back of the skirt using a small zig zag stitch. (Tip: use thread that matches your label for the top stitch and thread that matches your skirt in your bobbin for the back side.)

Now it's time to applique a design onto the shirt. Simply iron on some Wonder Under or Heat and Bond Light to the backside of your leftover bandana fabric. Trace your design (make sure it is backwards for something that is directional like a powercat) and cut out. Remove paper backing and iron onto the front of the shirt as per package directions. I fold the shirt in half and iron to help find the center. Iron on Totally Stable to the back of the shirt and sew around the edges of the fabric with a tight zig zag stitch. I like to also apply Fray Check all around the edges of the fabric before I stitch it on. Allow to dry completely before beginning to applique, or your stabilizer will rip. I will usually use a 3.0 - 4.0 stitch width with a .3 stitch length. See this post for more on appliqueing and using a template to position a powercat.
I have also started using an over the back fusible interlining after appliqueing to help those stitches be more comfortable against the skin. I cut out a piece just slightly larger than the applique and iron it on using steam and the temperature for synthetic fabrics on my iron.
And you are done!
Here are a couple of other examples of skirt sets I have made.


Hope you enjoy this project as much as I have!


Comments
Post a Comment