Posts

Showing posts with the label Gift Ideas

Favorite Chocolate Chip Cookies
Image
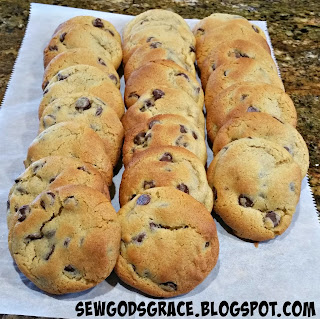
I have made a lot of different chocolate chip cookie recipes over the years, but these are by far my family's favorite!  I have made them so many times that I have the recipe memorized.  Recently, we were in Colorado at my husband's parents' vacation home, and of course we had the need for some homemade cookies.  They looked so pretty on the counter that I thought I'd better get a picture so that I could share the recipe here. Favorite Chocolate Chip Cookies 1 cup (2 sticks) butter, slightly softened  (see note) 3/4 cup packed brown sugar 1/4 cup white sugar 1 small box instant vanilla pudding (3.4 ounce size) 2 eggs 1 teaspoon vanilla 2 1/4 cups flour (see note) 1 teaspoon baking soda 1/2 teaspoon salt, optional 2 cups chocolate chips Cream butter, sugars, and pudding mix for 2-3 minutes in electric mixer.  Meanwhile, mix flour, baking soda, and salt if using.  Crack eggs into a separate container and add vanilla.  Add to butter mixt...

Homemade Taco Seasoning

Image
Almost every Tuesday is "Taco Tuesday" at our house.  I love it because, well, I love tacos.  Also, I don't have to think about what we are going to eat for supper that day! I have adapted my recipe for taco seasoning from this one  here. 1/2 cup chili powder 1/8 cup onion powder 1/8 cup ground cumin 1 tablespoon garlic powder 1 tablespoon paprika 1 tablespoon sea salt 1 1/2 tablespoons oregano 1/8 teaspoon each cayenne pepper and chipotle pepper powder, optional Place all ingredients in mason jar with a lid and shake well. I use a heaping tablespoon per pound of meat and add 1/4 to 1/2 cup of water; adjust to your preference! To make chicken for tacos, I place frozen chicken breasts in the crockpot, add seasoning and some coconut oil (about 2 Tablespoons for 3 pounds meat), and cook on high for 3 - 3 1/2 hours.  Then Ishred the chicken in my Kitchenaid mixer and put it back in the crockpot on "warm" until we are ready to eat.  I like to make e...

Bandana Skirt Set

Image
I have had the pictures for this post for quite a while, but I knew if was going to take me a long time to type it up.  I have made several of these outfits to sell at a craft fair and also for gifts, and I think they are so cute!  You can make them anywhere from a size 6 month up to about 4T.  I will try to make these instructions as clear as possible.  If you have any questions, please leave them for me in the comments, and I will try to explain the steps better! To start, you will need the following: 1.  Child's T-shirt in the size and color you want 2.  2 bandanas 3.  5.5 to 6.5 inches of border fabric 4.  3/4 inch elastic 5.  Wonder Under or Heat and bond light fusible webbing 6.   Totally Stable iron on stabilizer 7.  Optional but nice, " Over the Back Fusible Interlining " for the back of the applique 8.   Fray Check 9.  Basic sewing skills and tools, ie thread, rotary cutter, etc. All seams ar...

Anna's Dress

Image
I'm not sure how this little girl is already seven!  We celebrated Anna's birthday last week.  This week, she wanted to wear the dress I made for her birthday, and she wanted her hair curled, and we went to the park.  The result?  I followed her around for a while trying to get a good picture of her.  Thankfully she cooperated with me pretty well.  I kept telling her not to move while I was taking the picture, and at one point she asked exasperatedly, "Can I breathe while you take the picture?"  Oh my, I see a lot of myself in this one! My in laws bought me a serger for Christmas this year.  I was excited to try it, but also intimidated, so it sat in the box for a couple of months.  Well, I finally got brave and took it out of the box and started sewing with knit fabric.  I am falling in love with how fast it is to throw something together! This dress is Greenstyle Creations Regan Dress , and I absolutely love it.  It is a...

Powercat Onesie with PJ Pants

Image
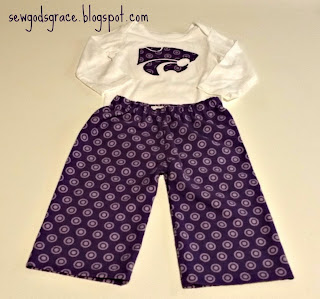
So the day is fast approaching for our new little guy to be born.  Which means that I am frantically nesting.  For me, that includes cleaning every nook and cranny and sewing madly on different projects that I think I will never finish once the baby comes!  It's probably a good thing we are having another baby, because I'm pretty sure I hadn't cleaned out our bathroom cabinets since I was pregnant with Grant! I finished up this onesie and pj pants set yesterday.  The pattern for the pants is found here and is really quite simple.  I do cut the front of the pants a little lower than the back--about one inch or less.  Tip:  when you do this,  put the legs pieces right sides together to make sure you are cutting a mirror image (ask me how I know this!) To applique the powercat, I followed my usual steps as outlined in this post .  I also ironed this product on the back so that it won't irritate baby's skin.  His Christmas present ...

Ruffle Apron

Image
I have been feeling the urge to sew this week and have completed a couple of projects.  I needed a gift for my step mom for Mother's Day, so I decided to make her an apron. I used this pattern from the Dating Divas.  One tip I would offer on the ruffle is just to sew one end shut, turn it right side out, press, and then start pleating.  When you get close to the end, cut off the extra fabric and sew the ends shut.  Press and finish pleating.  As per the instructions, I tried several times to get it to come out exactly right, and I about drove myself crazy! I'm planning to make some more of these close to Christmas time with some really cute snowman fabric!

Phoebe Purse

Image
My sister-in-law, Joni, posted a purse on Facebook that she had made using a free pattern online.  I loved the shape of it, and I was in need of a gift idea for my mother-in-law for Mother's Day. I downloaded the pattern ( Phoebe purse ) and put it together in a couple of afternoons this week.  Thanks to Joni for helping me get some material picked out--always the hardest part for me!  One tip that I would offer is that you will need a fairly sturdy needle when you are sewing layers together--I used a size 100/16. We celebrated Mother's Day with Lois on Wednesday night because they were going to be out of town this weekend.  I think she really liked the purse!  Now on to more projects. . .

Grant's Quilt, Finished!

Image
So I had pieced Grant's quilt top together and had it finished when he was just a few months old.  Then it sat and sat in a bag until I finally got it to my friend Kristy to machine quilt it for me.  She returned it me around January of 2014.  She did an amazing job with it.  If you live in the Cheyenne Wells, CO area, you should really check out The Rambling Rose Quilt Shop .  Matt's aunt Sarah helped me to machine sew the binding around the edge of the quilt, and then it sat again in my closet, waiting for me to finish it up. About a week before Grant's birthday this June, I got a burst of energy and decided to do the hand sewing on the back of the binding to finish up Grant's quilt for his birthday. Being two, he was not that impressed with the quilt, but I think it will be something he enjoys over the years. I'm not sure why, but this morning I decided to try to get a picture of Grant--my wiggly, busy boy--sitting on his quilt.  This is the bes...

Powercat Appliqued T-shirts

Image
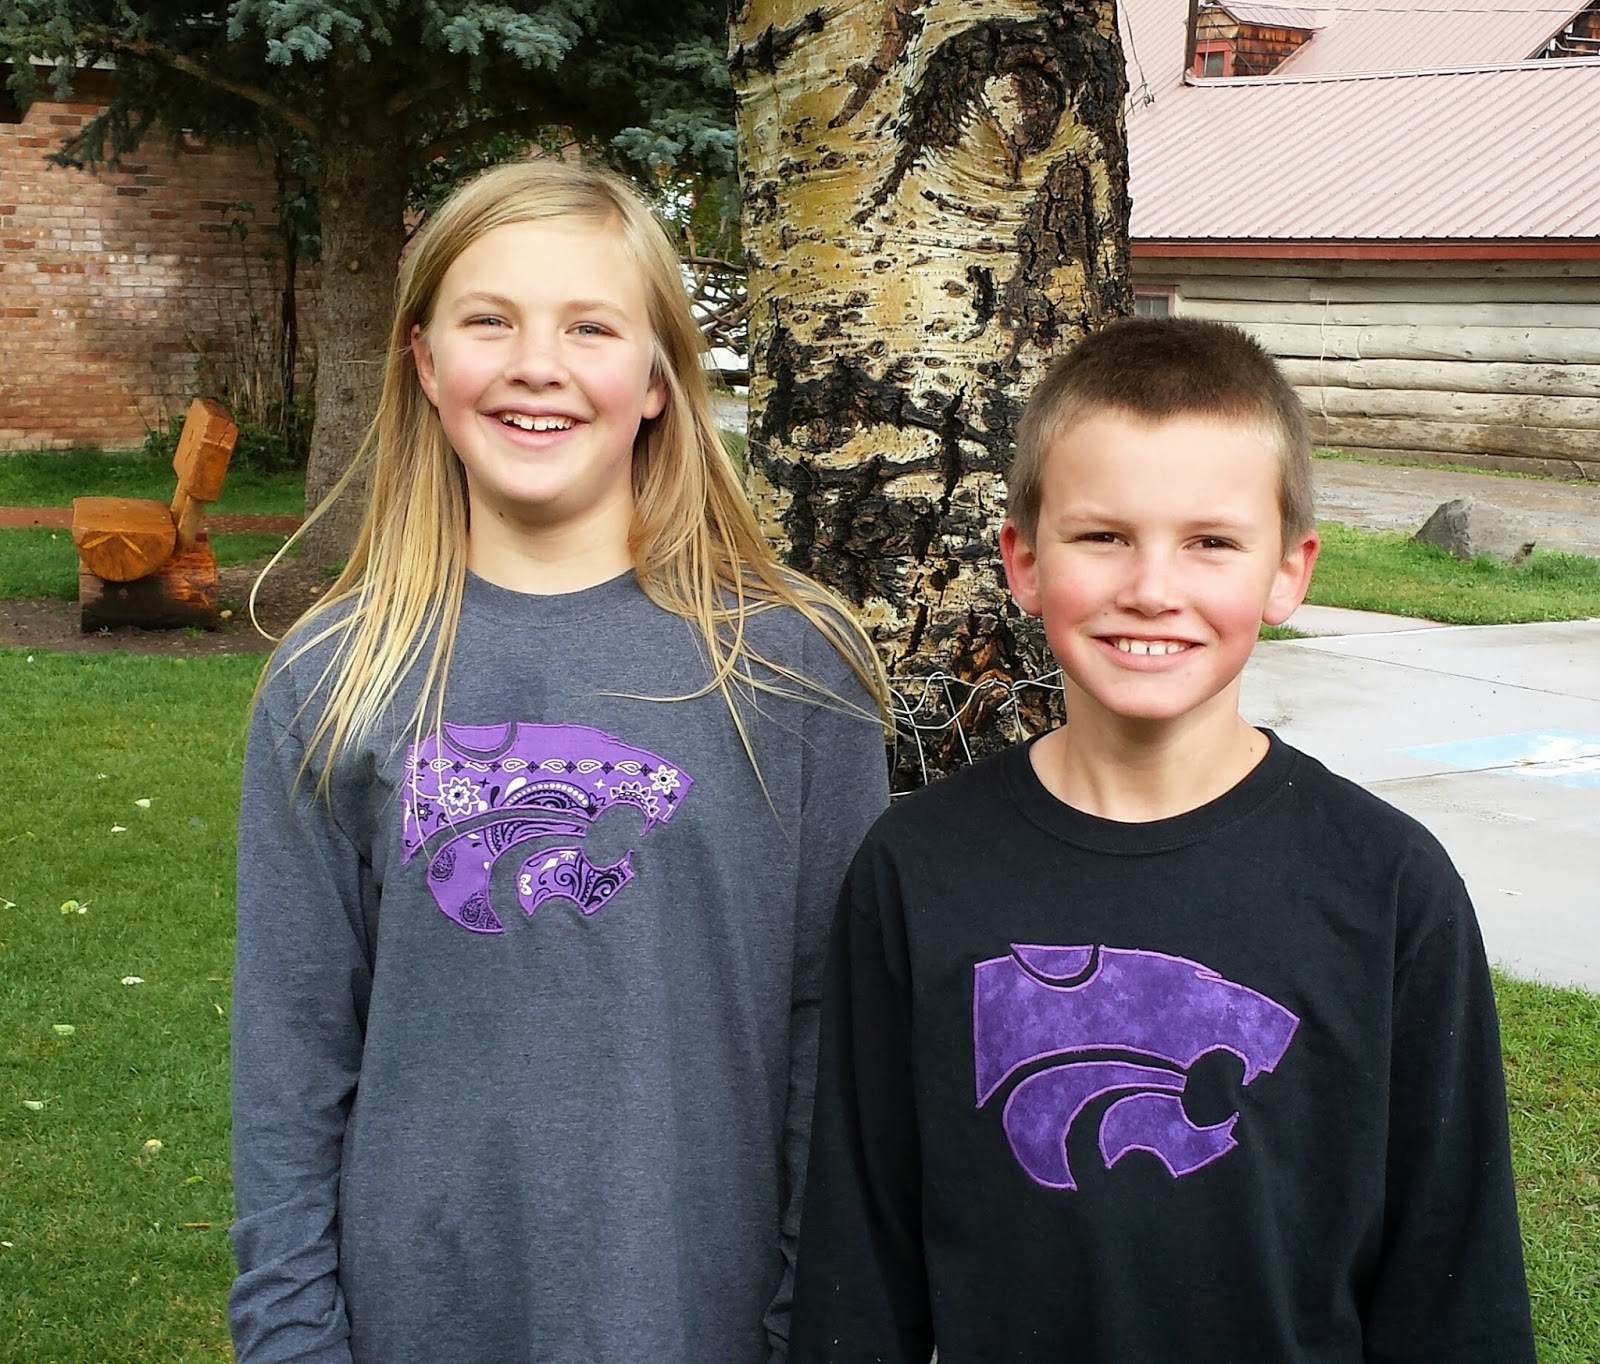
I was shopping for some new shirts for Maddie the other day, and we weren't finding a whole lot of interesting ones (or ones that had logos/sayings that I was comfortable with!). I finally just picked out a plain gray shirt and told her we would applique something onto it. She requested a powercat, and I was happy to comply. She really liked it, as did her brother Evan. So we made one for him, too! For more details on how to applique on a t-shirt, see this post . Then see this post for help on placing your powercat applique. I fold the t-shirt in half to find the center.  Be sure to use a ball point needle for knits. I've enjoyed making these with the kids because they are able to trace and cut out their patterns and even iron them in place. Makes for a pretty quick afternoon project!

Reversible Tote Bag

Image
I have said it before, and I will say it again:  "I am not a great photographer."  I didn't have a lot of time to get a good picture of this, but I didn't want to let it prevent me from sharing this fun project. I found this pattern on Pinterest, and I thought it looked quick and easy.  However, I like a bag that will stand up on its own.  So, I modified the pattern and added a lining.  And. . . it came out great!  I've ordered some additional fabric to make some more of these--maybe I will get a better picture then. So, follow the instructions found here , with a few exceptions. You will need two fabric rectangles for the outside of the bag, and two fabric rectangles for the inside lining of the bag.  Cut them 17.5 by 21 inches. You will also need two 17.5 by 21 inch pieces of medium weight fusible interfacing.  Fuse these to the two pieces of outer fabric. Follow the instructions to make your outer bag and lining. For the handl...

Homemade Dark Chocolate

Image
Since my sister-in-law had a baby in December, she has cut out dairy from her diet because he seems to get fussy when she eats it.  This means--gasp!!--she can't have chocolate.  So, of course, I thought I should help her out by making her some homemade, dairy-free dark chocolate.  Homemade Dark Chocolate (Adapted from this recipe ) 1/4 cup coconut oil, melted 1/4 cup coconut butter, softened 1/2 cup cocoa Approximately 2 tablespoons honey 1/2 teaspoon vanilla Hefty shake cinnamon Melt your coconut oil over low heat in a small skillet while you assemble the rest of your ingredients.  Mix all ingredients in a medium bowl or pitcher.  I just eyeball the amount of honey.  Taste and add more honey if needed.  Don't freak out at the texture--it is much better when it sets up!  Pour into lined mini muffin cups or use a silicon tray.  I like this one from Amazon. Place in the refrigerator or freezer and allow...

Swim Teacher Gift, Take 2!

Image
Last year, the kids and I made this to give to their swim teacher after they completed their lessons.  Judging by the number of hits that post got, I thought others might be interested to see what we did for their swim teachers this year. Having just finished two weeks worth of lessons (three hours each morning since I had three in different levels!) we definitely felt like celebrating with some cupcakes.  Since we were finishing up on July 4th, we baked cupcakes in star-spangled cupcake liners.  (Local people, check out the cupcake liners at the General Store in Sharon Springs--I love them!) I put the cupcakes into clear plastic cups after frosting them with red frosting.  The kids were more than happy to help with 4th of July-themed sprinkles (The sprinkles were also from the General Store, just FYI.)  I wrapped the cups in cellophane because I was out of clear plastic treat bags.  I will be stocking up on those because the cellophane was much ha...

Anna's Doll

Image
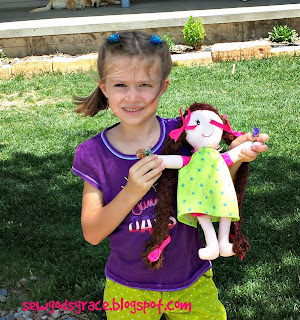
I suppose it's no secret that I like making things for my girls.  Anna kept saying that she wanted a doll with hair that she could braid.  So,when I stumbled across this cute pattern for a doll on one of my favorite blogs-- Crazy Little Projects , I knew I had to make it for her.   I made the doll with super-long hair so that she could braid it.  My sister-in-law had some leftover yarn that she gave me to use.  It is really soft with sparkles in it.  I knew Anna would love the sparkles. I made the doll similarly to what the tutorial said.  However, I did not sew the arms in at the same time that I sewed the front and back pieces of the doll together.  I left openings for the arms and sewed them on by hand.   I used this paint for the doll's face.  I was nervous about painting on the finished doll face and possibly ruining it.  I used disappearing ink to draw on the doll's face and used a toothpick to apply a smal...

Hello Kitty Hooded Towel

Image
I made this hooded towel for Lyla for Christmas.  I got my inspiration from Crazy Little Project 's animal hooded towels.  If you haven't seen this blog, you need to check it out!  I have made the Angry Birds Hooded Towel and the Teddy Bear Towel .  She has tons of other tutorials and fun stuff, so be sure to take a look. Anyway, here is what you will need to make the Hello Kitty Towel: 1 full-sized white towel (Target makes a quick-dry one that I really like!) 1 white hand towel Black and yellow felt for eyes and nose Pink felt or ribbon for the bow Basic sewing equipment 1.  Cut your hand towel in half width-wise.  Fold the finished edge under about 3-4 inches and sew.  See this tutorial for more details. 2.  Adhere Wonder Under fusible webbing to back side of felt and cut out eyes and nose.  Iron onto towel according to package directions.  For the pattern, I simply did a Google search for Hello Kitty images.  ...

Felt-Embellished Sweater Hat

Image
I made this last year for Anna, and I never got a post up.  I used an old sweater of mine, so I felt sort of "thrifty."  Anyway, Anna had it on today, so I had to get a picture of her! I used the tutorial found  here .  I used an existing hat as a pattern. I simply cut the petals and center for the flower from felt using my pinking shears.  I made a line down the middle of each petal, pinned them in place, and sewed down the line using my machine.  I then folded the circle for the center of the flower to make it stand out a bit and hand-sewed it in place. This is one of those projects that should be quick and easy, and it actually was!  As a bonus, Anna is still wearing it a year later!

Mason Jar Mini Pies

Image
Our church was preparing care packages for the college students for finals week, and I wanted to make something special to include in them.  I had been wanting to try making pies in mason jars for a long time, so I finally decided to give it a try.  I was inspired by this post here . First wash 12 four ounce mason jars, lids, and rims and dry. Then make one recipe of Aunt Joyce's Pie Crust.  Find the recipe here . Roll out half the dough into a circle and use the ring from your mason jar to cut the tops for your pies. Then press dough on bottom and up the sides of the mason jars.  Place on a baking sheet. Fill with filling of choice.  The recipe I was following recommended 1/2 cup pie filling per pie, but I found that I did not need that much.  I made the apple pie filling adapted slightly from Betty Crocker--8 Granny Smith apples, peeled & chopped, 1/4 cup flour, 2/3 cup sugar and 1/2 teaspoon each nutmeg & cinnamon.  ...