Posts

Showing posts from 2014

Grant's Quilt, Finished!

Image
So I had pieced Grant's quilt top together and had it finished when he was just a few months old.  Then it sat and sat in a bag until I finally got it to my friend Kristy to machine quilt it for me.  She returned it me around January of 2014.  She did an amazing job with it.  If you live in the Cheyenne Wells, CO area, you should really check out The Rambling Rose Quilt Shop .  Matt's aunt Sarah helped me to machine sew the binding around the edge of the quilt, and then it sat again in my closet, waiting for me to finish it up. About a week before Grant's birthday this June, I got a burst of energy and decided to do the hand sewing on the back of the binding to finish up Grant's quilt for his birthday. Being two, he was not that impressed with the quilt, but I think it will be something he enjoys over the years. I'm not sure why, but this morning I decided to try to get a picture of Grant--my wiggly, busy boy--sitting on his quilt.  This is the bes...

Candy Corn M&M Cookies

Image
Do any of you remember the cartoon Fat Albert?  "Hey, Hey, Hey. . It's Faaat Albert!"  Probably not too politically correct today.  Anyway, I don't remember much about the cartoon show, but I do remember watching the Halloween special for Fat Albert and eating chocolate peanut butter chip cookies that my mom had made.  I started thinking about that when I was making these cookies.  It's funny how our memories can be tied into food, isn't it? I am still working on fall-themed cookies for the baby shower that I am helping with for this weekend.  I thought these would be a neat addition, and I was really happy with how they turned out.  My littlest, Grant, obviously thought they looked tasty, because he started asking for one as soon as they came out of the oven! Here's the recipe (adapted from  this recipe ): Candy Corn M&M Cookies (Yield:  approximately 20-24 cookies) 1 16.5 ounce box chocolate cake mix  (I used Duncan ...

Candy Apple M&M Cookies

Image
I was planning to make some cookies for a fall-themed baby shower this weekend, so when I saw some Candy Apple Flavored M&M's, I knew I wanted to try them out in a cookie. Here's the recipe (adapted from this recipe ): Candy Apple M&M Cookies (Yield:  approximately 20-24 cookies) 1 16.5 ounce box yellow cake mix 2 eggs 5 tablespoons butter, melted 1 cup butterscotch chips 1 bag Candy Apple M&M's Beat cake mix, eggs, and butter until blended.  Add butterscotch chips and M&M's.  Refrigerate overnight.  Meanwhile, place remaining M&M's in freezer if you are going to do the optional step below.  Drop by two tablespoon-sized balls on parchment-lined baking sheet.  Bake at 350 degrees for 12-14 minutes.  Let sit on baking sheet for 5 minutes before removing to wire racks to cool completely. Optional:  After the cookies have been baking for 8 minutes, remove from oven and press 2-3 M&M's on top.  This is st...

Baked Parmesan Chicken

Image
This is one of my family's favorite recipes.  I modified the recipe slightly from my Best of Taste of Home, The First 10 Years cookbook.  When I serve it, my middle daughter, who usually struggles with getting her meat finished, always asks for seconds! Here's the recipe: 1 cup grated Parmesan cheese 1/2 cup almond flour (can use dry bread crumbs if you prefer) 2 teaspoons dried oregano 2 teaspoons parsley flakes 1/2 teaspoon paprika 1/2 teaspoon pepper 12 boneless skinless chicken breast halves 1/2 cup butter, melted In a shallow pie pan, combine the first six ingredients and mix well.  Pour butter into another pie pan.  Dip chicken in butter and then into crumb mixture.  Place in greased 15 by 10 inch baking pan.  (You will have to squeeze them in a bit!)  Bake, uncovered, at 400 degrees for 20-25 minutes or until chicken is tender and juices run clear.  (I use a meat thermometer and cook until 165 degree internal temperature....

Whole Wheat Dinner Rolls

Image
I found this recipe on Pinterest over a year ago.  I have made it many times and have altered it just a bit, so I thought it was time to post my variations. Though the original recipe says that these are "30 Minute Rolls," it takes me slightly longer than that to have these ready.  That being said, they are fast.  I have often found myself (at 5:00 PM) deciding to make these to go along with supper that evening.  They are one of my kids favorites, and they freeze great, too (if you have any leftovers.)  We have even used them as buns for hamburgers or hot ham and cheese. Here's the recipe: Whole Wheat Dinner Rolls 2 1/4 cup warm water 2/3 cup butter, melted 1/4 cup yeast 1/2 cup sugar 1 T. salt 2 eggs, slightly beaten 4 1/2 cups all purpose flour, divided 3 cups whole wheat flour Preheat the oven to 400 degrees.  Combine water, butter, yeast, and sugar in mixer bowl and allow to proof for 15 minutes.  Add remaining ingredients ex...

Powercat Appliqued T-shirts

Image
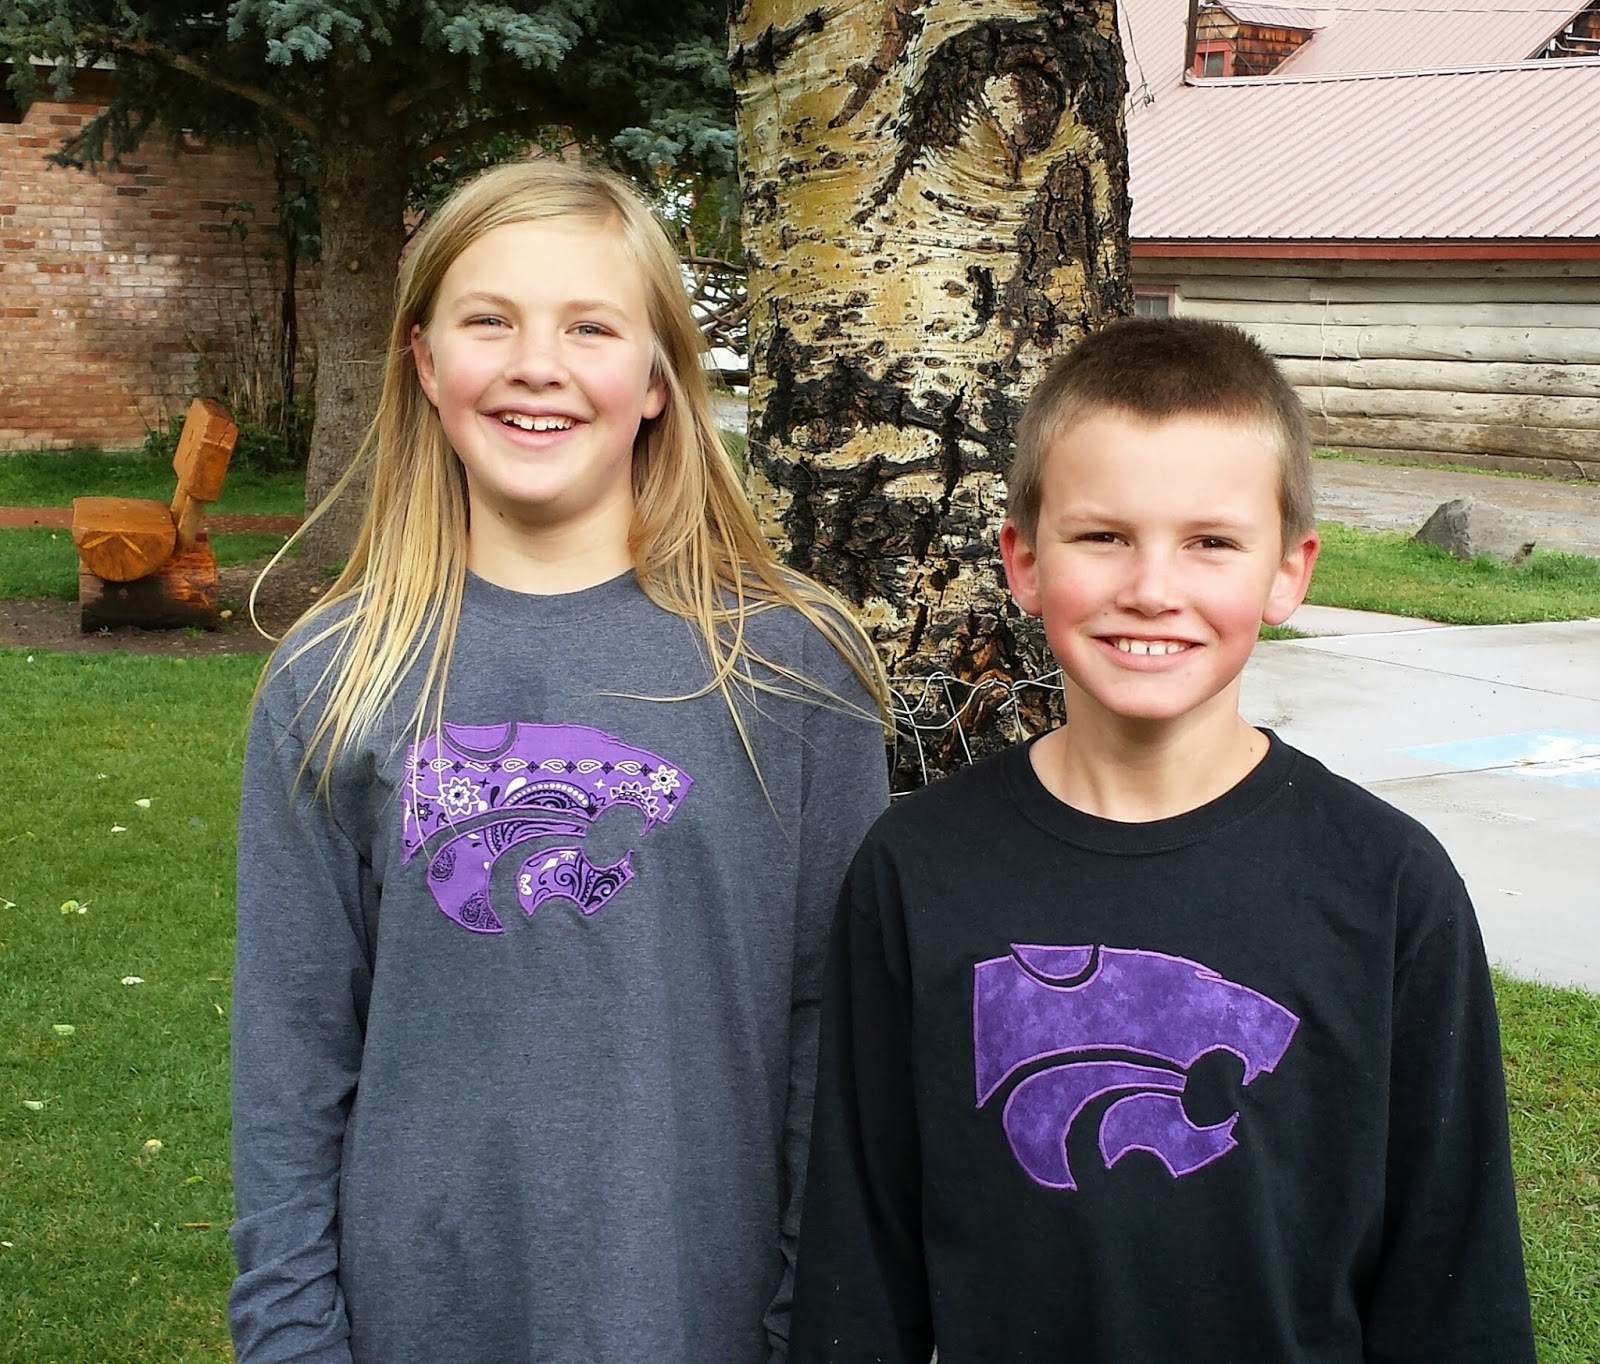
I was shopping for some new shirts for Maddie the other day, and we weren't finding a whole lot of interesting ones (or ones that had logos/sayings that I was comfortable with!). I finally just picked out a plain gray shirt and told her we would applique something onto it. She requested a powercat, and I was happy to comply. She really liked it, as did her brother Evan. So we made one for him, too! For more details on how to applique on a t-shirt, see this post . Then see this post for help on placing your powercat applique. I fold the t-shirt in half to find the center.  Be sure to use a ball point needle for knits. I've enjoyed making these with the kids because they are able to trace and cut out their patterns and even iron them in place. Makes for a pretty quick afternoon project!

Reversible Tote Bag

Image
I have said it before, and I will say it again:  "I am not a great photographer."  I didn't have a lot of time to get a good picture of this, but I didn't want to let it prevent me from sharing this fun project. I found this pattern on Pinterest, and I thought it looked quick and easy.  However, I like a bag that will stand up on its own.  So, I modified the pattern and added a lining.  And. . . it came out great!  I've ordered some additional fabric to make some more of these--maybe I will get a better picture then. So, follow the instructions found here , with a few exceptions. You will need two fabric rectangles for the outside of the bag, and two fabric rectangles for the inside lining of the bag.  Cut them 17.5 by 21 inches. You will also need two 17.5 by 21 inch pieces of medium weight fusible interfacing.  Fuse these to the two pieces of outer fabric. Follow the instructions to make your outer bag and lining. For the handl...

Homemade Caramel Sauce

Image
This recipe takes me back.  When I was growing up, it was a special day when Grandma would make chocolate waffles .  We would eat them with vanilla ice cream drizzled with this caramel sauce. Please note that this makes a very thin sauce.  If you want it thicker, double the cornstarch. Here's the recipe: 1/4 cup butter 1 cup brown sugar 1 tablespoon cornstarch dissolved in 1 cup cold water 2 teaspoons vanilla extract Melt butter in heavy sauce pan.  Add brown sugar, then cornstarch and water mixture.  Bring slowly to a boil, stirring often.  Remove from heat and add vanilla before serving.  Serve warm. I let mine cool a bit and then put it in a plastic container and stored in the refrigerator.  The butter will separate upon refrigerating.  Simply warm it up in the microwave before serving. Serve this over chocolate waffles and/or some homemade vanilla ice cream ! Looking for other ice cream toppings?  Check out thi...

Maddie's 10th and Grant's 2nd Birthday Party

Image
We were excited to be done with harvest and able to celebrate Maddie's tenth and Grant's second birthday on July sixth (Maddie's actual birthday!) I say this every year, but I can't believe how quickly time has flown and how much these two have grown!  With Maddie hitting double digits, I am starting to realize anew how important it is to enjoy every moment. Maddie is into horses, so I wanted to make her a horse-themed cake.  I really like cupcakes because they are easy to serve.  For instructions on how to make this cake, see this post. Grant loves Elmo (or "Mo-Mo," as he calls him), and I knew if would be easy to make Elmo cupcakes.  I simply used black decorator gel to make the mouths, then piped red stars on with a #16 Wilton tip to make the fur.  The nose is an orange pretzel M & M, and the eyes are candy eyes bought at Walmart . One note:  I made these ahead of time and froze them.  When they thawed, the black on the eyes ble...

Horse Cupcake Cake

Image
My daughter Maddie just turned 10, and she really likes horses.  So, when I saw a picture of a cake like this on Pinterest, I knew that I wanted to make one for her birthday party.  I couldn't find any tutorials online for how much frosting to make, etc., so I thought I would post how I did it. It was a pretty easy cake.  Maddie and I baked the cupcakes and had it frosted in an afternoon! You will need: 26 cupcakes (see my recipe below or use your favorite!) 2 recipes  this chocolate frosting 1 recipe this buttercream frosting (you will have extra left over) Cake board (I use a piece of cardboard covered with aluminum foil) Wilton 1 M cupcake frosting tip Frosting bags (Use disposable--you will thank me later at clean up time!) Wilton size 3 tip or larger What to do: 1.  Bake your cupcakes.  I used this recipe from pinterest for modifying a white cake mix.  I used a Funfetti cake mix. To a white cake mix add 1 cup flour, 1 cup sug...

Homemade Dark Chocolate

Image
Since my sister-in-law had a baby in December, she has cut out dairy from her diet because he seems to get fussy when she eats it.  This means--gasp!!--she can't have chocolate.  So, of course, I thought I should help her out by making her some homemade, dairy-free dark chocolate.  Homemade Dark Chocolate (Adapted from this recipe ) 1/4 cup coconut oil, melted 1/4 cup coconut butter, softened 1/2 cup cocoa Approximately 2 tablespoons honey 1/2 teaspoon vanilla Hefty shake cinnamon Melt your coconut oil over low heat in a small skillet while you assemble the rest of your ingredients.  Mix all ingredients in a medium bowl or pitcher.  I just eyeball the amount of honey.  Taste and add more honey if needed.  Don't freak out at the texture--it is much better when it sets up!  Pour into lined mini muffin cups or use a silicon tray.  I like this one from Amazon. Place in the refrigerator or freezer and allow...

Super Easy Chicken & Broccoli Bake

Image
Since starting on a mostly-paleo diet almost two years ago, I must say that I sometimes miss the ease of popping a casserole in the oven.  This easy, one-dish meal has been a go-to recipe for me.  I make it at least twice a month!  I can have it ready and in the oven quite quickly.  Plus, it's healthy and delicious.  Here's the recipe. Super Easy Chicken and Broccoli Bake (Slightly adapted from this recipe ) 8 four ounce boneless skinless chicken breasts 3 medium sweet potatoes, peeled and cut into bite-sized pieces 1-2 heads broccoli 1/2 cup olive oil 1 1/2 teaspoons garlic powder 1/2 teaspoon oregano salt and pepper, to taste Place sweet potatoes in a microwave-safe bowl.  Add a small amount of water, cover, and cook on high for five to six minutes or until slightly tender.  Drain.  Place oil and spices in a large bowl and stir to combine.  Place chicken, sweet potatoes, and broccoli in bowl and stir well to coat.  Pla...

Swim Teacher Gift, Take 2!

Image
Last year, the kids and I made this to give to their swim teacher after they completed their lessons.  Judging by the number of hits that post got, I thought others might be interested to see what we did for their swim teachers this year. Having just finished two weeks worth of lessons (three hours each morning since I had three in different levels!) we definitely felt like celebrating with some cupcakes.  Since we were finishing up on July 4th, we baked cupcakes in star-spangled cupcake liners.  (Local people, check out the cupcake liners at the General Store in Sharon Springs--I love them!) I put the cupcakes into clear plastic cups after frosting them with red frosting.  The kids were more than happy to help with 4th of July-themed sprinkles (The sprinkles were also from the General Store, just FYI.)  I wrapped the cups in cellophane because I was out of clear plastic treat bags.  I will be stocking up on those because the cellophane was much ha...

French Toast Bake

Image
This is one of my son's favorite breakfasts!  Since is has a caramel sauce on the bottom, he has always called it "Jelly French Toast."  If I ask him what he would like for breakfast, that is usually his request.  I have been wanting to post this recipe for quite a while.  However, my pictures have not turned out so great.  So this morning I finally got one that we thought was decent.   For this recipe, you do need to plan ahead since it needs to refrigerate overnight.  It comes together in a flash, though.  It's also a great way to use up your bread that has gotten a bit too stale for sandwiches.  Sometime I hope to make it using some homemade French bread.  (I'll update when I do!) French Toast Bake (From Recipes and Memories--Sharon Springs Wesleyan Church Cookbook, recipe submitted by Carmen Selzer) 1 cup brown sugar 1/2 cup butter 2 teaspoons light corn syrup 12 slices sandwich bread Cinnamon 6 egg...

Anna's Doll

Image
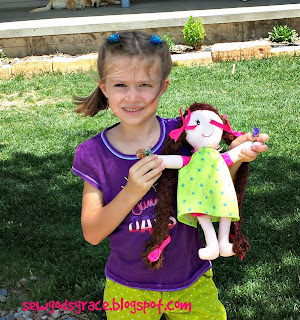
I suppose it's no secret that I like making things for my girls.  Anna kept saying that she wanted a doll with hair that she could braid.  So,when I stumbled across this cute pattern for a doll on one of my favorite blogs-- Crazy Little Projects , I knew I had to make it for her.   I made the doll with super-long hair so that she could braid it.  My sister-in-law had some leftover yarn that she gave me to use.  It is really soft with sparkles in it.  I knew Anna would love the sparkles. I made the doll similarly to what the tutorial said.  However, I did not sew the arms in at the same time that I sewed the front and back pieces of the doll together.  I left openings for the arms and sewed them on by hand.   I used this paint for the doll's face.  I was nervous about painting on the finished doll face and possibly ruining it.  I used disappearing ink to draw on the doll's face and used a toothpick to apply a smal...

Anna's and Lyla's Birthday Party

Image
In the interest of staying sane, we have started combining some of the kids' birthday parties.  So this year, Anna and Lyla had their party together.  We had a great time celebrating Anna's sixth birthday (coming soon in May) and Lyla's fourth birthday (in April.)  Time has sure flown--I can't believe how big my girls are getting. Anna requested rainbows, and Lyla wanted Hello Kitty again for themes for their cakes.  I decided to make cupcakes.  That way I could decorate half with each girl's theme.  What better way to have a Rainbow Hello Kitty party? We made rainbow cupcakes by dividing the cake batter and using food coloring to make the cupcakes themselves in a rainbow pattern.  My son Evan and I spent quite a while one morning scooping small amounts of colored batter into cupcake pans.  We used two boxes of 15.4 ounce white cake mix, and we made 28 cupcakes.  I think we could have made 30 so that the cupcakes would not have bee...

Cooking Hamburger in the Crockpot

Image
So, I'm always looking for new ways to use my crock pot to make things easier for me.  Usually, if I want to cook hamburger, I will do it in my microwave.  However, I can only cook 2 pounds at a time.  As our family has grown and the kids get older, I have been trying to make large quantities of my recipes and then freeze half for later.  Also, 2 pounds of meat doesn't go as far as it used to! As I was getting ready to cook 6 pounds of hamburger for a triple batch of chili, I thought, "I wonder if I can do this in my crock pot?"  I did a search to see if any other bloggers had done it, and it turns out they had! I have done this several times now for tacos, soups, and more. Here's what I do: Place meat in crock pot.  (I usually thaw a bit in the microwave, but it can be partly frozen.)  Add 1/2 cup water and cook on high for 3 to 3 1/2 hours.  I have a chopper that I use to break up my meat.  Every now and again, I go by and chop u...

Basalmic Vinaigrette Salad Dressing

Image
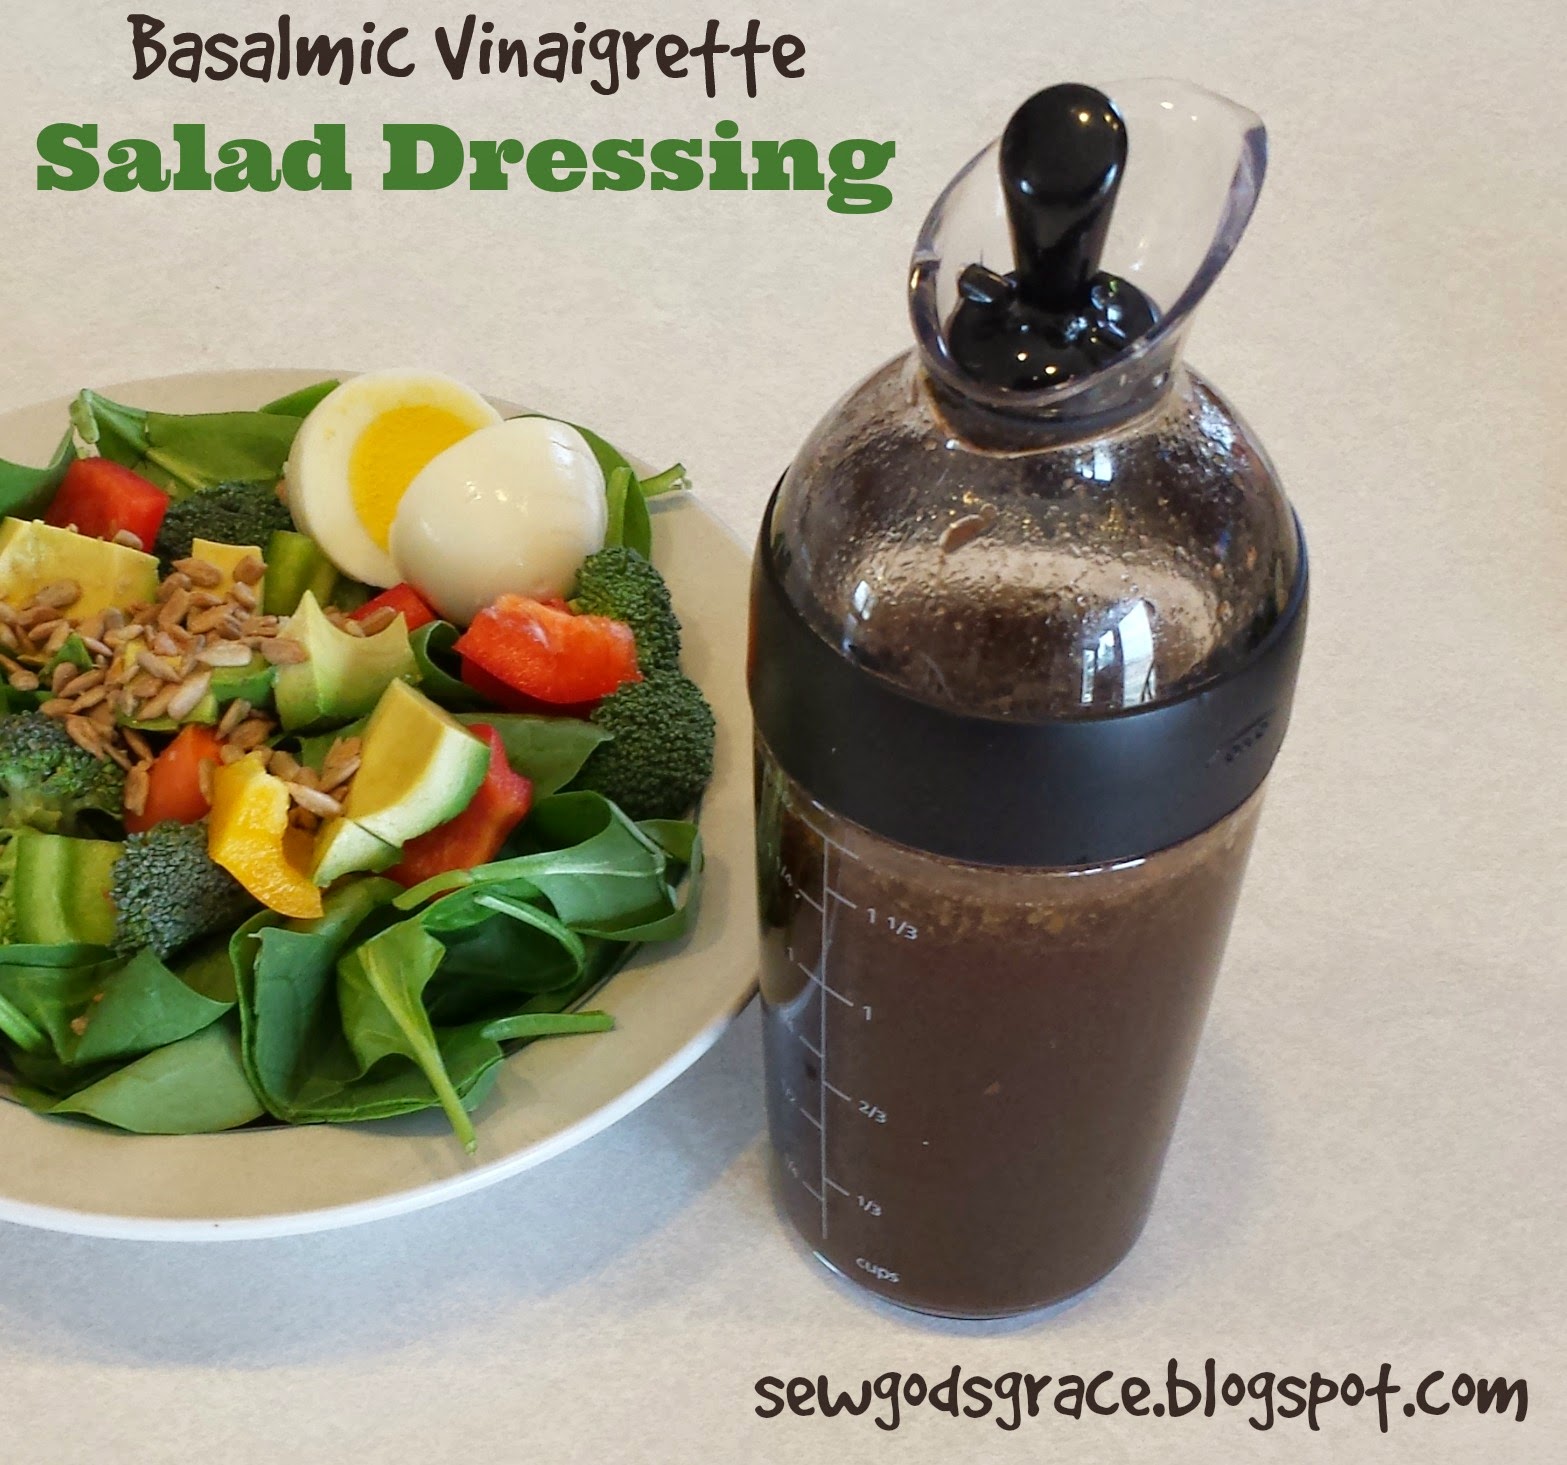
I started eating a mostly Paleo diet over a year ago.  Ever since, I have had a salad, a somewhat ridiculously big salad, almost every day.  Since it is difficult to find a store bought salad dressing without added sugar, I started making my own salad dressing.  I have tweaked the recipe from the original found here , so I thought it was time to post it! Basalmic Vinaigrette Salad Dressing (adapted from Paleo Leap Basalmic Vinaigrette Recipe ) 3/4 cup basalmic vinegar 3/4 cup olive oil 1 teaspoon oregano 1 teaspoon garlic powder 1 to 1 1/2 teaspoons ground mustard salt and pepper, to taste Mix all ingredients in a jar or dressing container (I like this one !) and shake well.  I go through mine fairly quickly, so I store it on my counter top.  If you don't eat salad as often as I do, you may want to store it in the fridge.  The olive oil will solidify in the fridge, so let it come to room temperature before serving. Variation:  subst...

Hello Kitty Hooded Towel

Image
I made this hooded towel for Lyla for Christmas.  I got my inspiration from Crazy Little Project 's animal hooded towels.  If you haven't seen this blog, you need to check it out!  I have made the Angry Birds Hooded Towel and the Teddy Bear Towel .  She has tons of other tutorials and fun stuff, so be sure to take a look. Anyway, here is what you will need to make the Hello Kitty Towel: 1 full-sized white towel (Target makes a quick-dry one that I really like!) 1 white hand towel Black and yellow felt for eyes and nose Pink felt or ribbon for the bow Basic sewing equipment 1.  Cut your hand towel in half width-wise.  Fold the finished edge under about 3-4 inches and sew.  See this tutorial for more details. 2.  Adhere Wonder Under fusible webbing to back side of felt and cut out eyes and nose.  Iron onto towel according to package directions.  For the pattern, I simply did a Google search for Hello Kitty images.  ...

Tractor and Grain Cart Cake

Image
For Evan's eighth birthday, he wanted a tractor and grain cart cake.  This is what I came up with.  Though I didn't take pictures as I was making it, I think I can describe the steps for it. You will need: 1 Funfetti (or your favorite) cake mix, prepared and baked as directed in a 9 by 13 pan 2 batches  one bowl chocolate cake .  Fill 9 by 13 pan 2/3 - 3/4 full.  You will have a little bit of batter left over. 2 mini donuts--use chocolate covered if you don't want to cover them with modeling chocolate. 4 large donuts.  I could not find large chocolate-covered donuts, so I ended up baking my own. Candy corn 3 batches Wilton Buttercream frosting (or 9 cups of your favorite cake-decorating frosting.) Gel food coloring--leaf green, orange, lemon yellow, and black 1 batch semisweet modeling chocolate , colored black # 3 and #16 decorating tips Frosting bags and couplers--make it easy on yourself and use disposable! 8 inch 2 by 4 board 6 inch 2...